This has been a super hard, super stressful semester for me. It has been, by far, the hardest semester I have ever taken. I know that I am getting close to the end because it just keeps getting harder and harder. It also doesn't help that most of my friends are going to student teach in the spring and they are so much closer to graduating then I am.
As I was signing up for classes, I was required to take a Foundations of Geometry class. I was super de duper nervous for the class because it was another proofing class, and I don't feel like the proofing class I had taken the previous semester truly prepared me for this one. (I took Foundations of Analysis). Another reason why I was nervous for the class was for the professor teaching it. She scares me. And not just like Santa scaring little kids at Christmas, but like waiting-for-your-parents-to-get-home-after-you-broke-the-brand-new-couch-while-wrestling-with-your-brother fear! I had an unfortunate experience with her two semesters prior, and I am still not over it...
Anyways, I convinced The Boy to take the class with me. It was not required for his degree, so really he was only taking it so that we could have another class together. I was so excited to be in a class with him again!! The first day of class Professor Andrist told us that this class was to help us stretch and grow and whatever else...and we were not allowed to work with other students in the class on any of our homework. This broke my heart. That meant that I couldn't work with The Boy on my homework. So many times I wanted to break that rule and just ask for help, but being the amazing man that he is, The Boy always refused to help me. {He didn't even help me when I had a nervous breakdown in the car and started crying uncontrollably because this class exponentially increased the grey hairs on my head!}
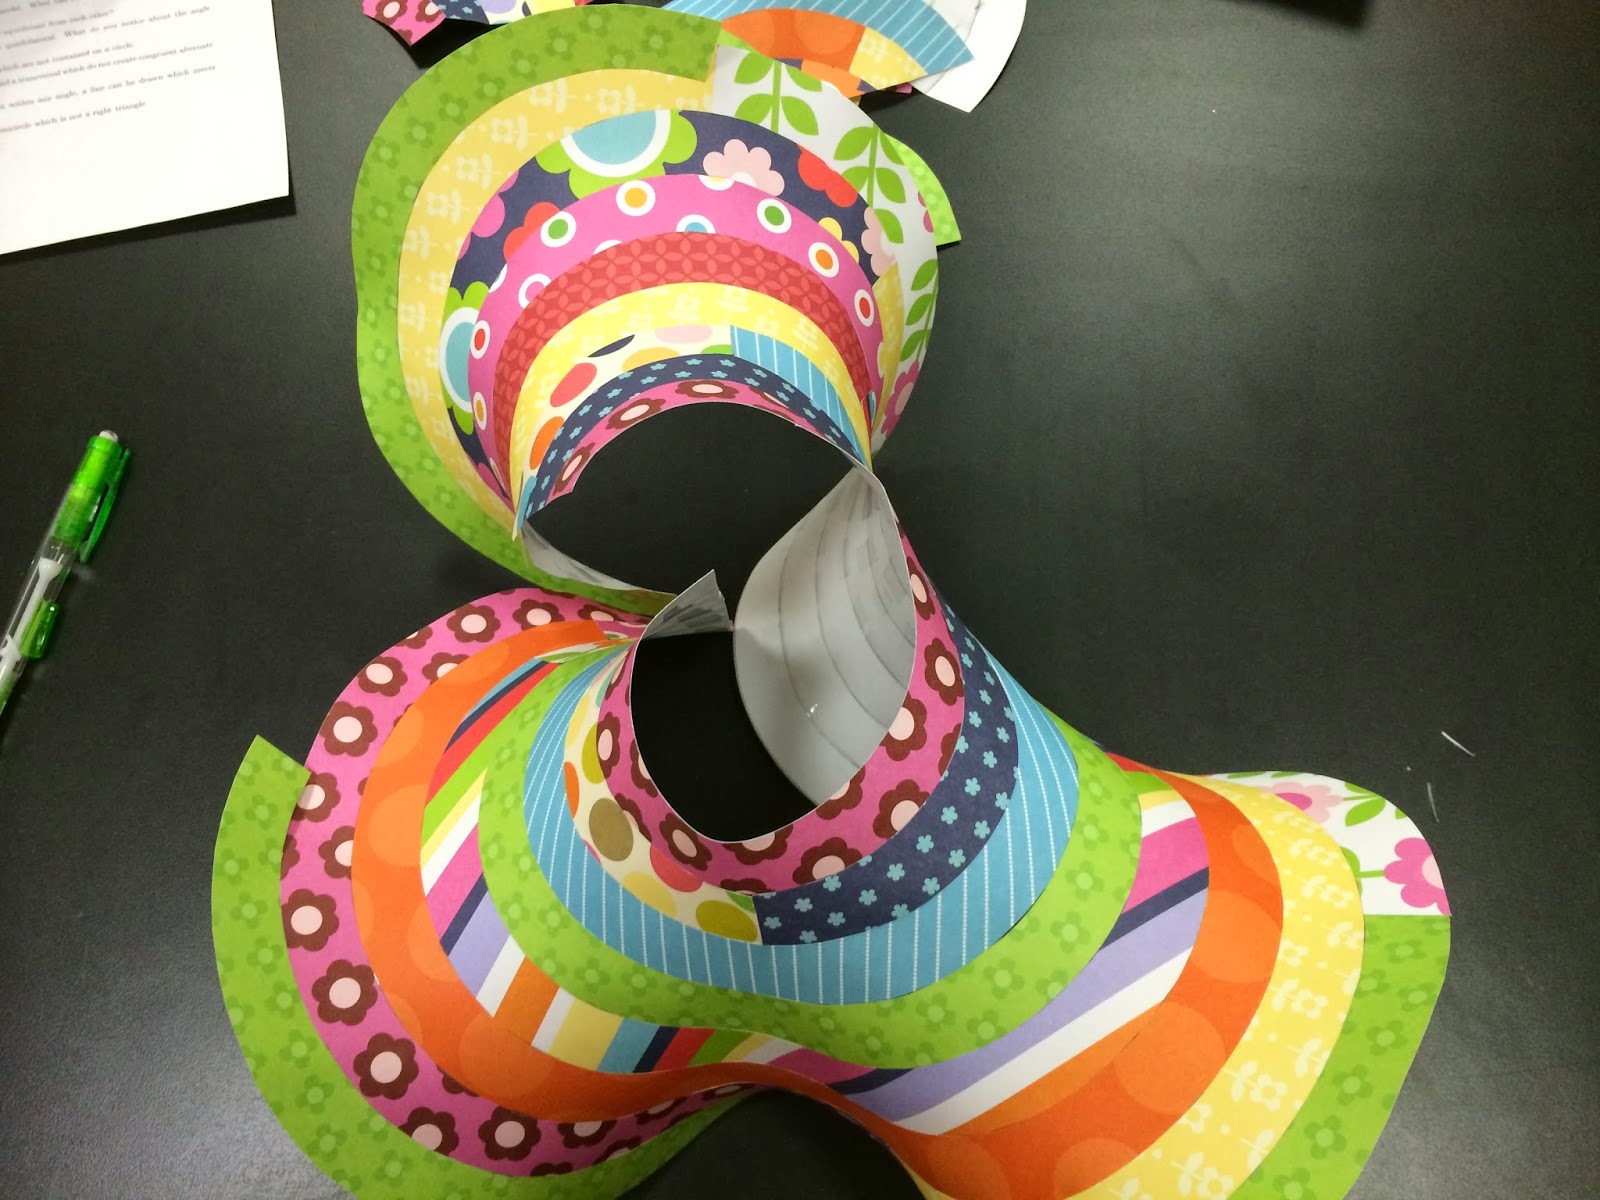
As the semester was going along, things got easy, and then hard. And then easy, and then super hard. Then we finished with the part of Geometry that the regular population knows about! We moved on to what is known as Hyperbolic Geometry. In lay man terms, it is the geometry of non-flat surfaces. Like a sphere....or a water slide.
Professor Andrist had this "great" plan to assign us this project. {Yippee!} She handed out the instructions and told us that it wouldn't take very long to get done. She actually said that we should work on it while watching a movie! {Then we all laughed at her and told her that none of us had time to watch a movie!}
The following is what the instructions entailed:

Did you get lost reading those instructions? ME TOO!! Luckily, Dr. Andrist brought in a few examples of what is was supposed to look like, and we kinda went from there.
Now, I am going to be completely honest with you! I don't want to sound whiny, but as a future educator, when I look back on this post, I want to be able to see what worked and what didn't work. And, if for any reason whatsoever, I decide to ever do this project with a future class of mine, I want the nitty gritty of it all to remind me that that would be a dumb decision!
Instructions #1:
It says to cut out approximately 20 rings. In reality, you need to cut out 29-30 circles. You should know that only ONE circle fits on a regular 8.5"x11" sheet of paper.
When the instructions say to use good quality bonded paper, what Dr. Andrist really wanted was good ol' regular computer paper. Don't use anything too thick, or too fancy. If you do, you get to deal with the consequences weeks, days, and hours before the dang thing is due.
Be very accurate should really say: "This project takes upwards of 7 hours. If you want to impress the teacher with your not-even-close-to-being-perfect Model, you need to spend anywhere from 9-15 hours stressing working on it. When you get together with your friends in the class to do non-school related things, this will come up. You will all compare how long it has taken you, and what it looks like. You will get your rulers out and compare how big of a gap is between each ring. {See Instruction #9 to know why this will give you even more grey hairs!}
If I were to do this with my future classroom, I would make ONE circle, make a gazillion copies (oops...there goes all my print credit...) and then give to the students to have them cut out on their own.
 |
| Outside: 10cm Inside: 8cm |
 |
| One completed ring. |
Instructions #2: Cut open the rings, make sure you cut a straight line when doing this. Otherwise, you will hate yourself later!
When taping together....this will take some finesse. What that should really say is: Tape some, and then you will cry. PROMISE! After you finish crying, tape some more. And keep taping! It will never turn out perfect, and it will never fit together "just right!" Accept your losses and move on.
Use small pieces of tape. Most of the time spent working on this fun project will be cutting tape into little pieces. Since I used scrapbook paper that was a little bit thicker than regular computer paper, I needed to use packaging tape that would hold better. This required cutting strips, to then cut into smaller strips, to then cut into small pieces, to then finessingly tape to your rings. It is ok to cry....more than once.
 |
| Do you see the billion little pieces of tape? I still didn't use enough.... |
 |
| Taping the rows on. |
Instructions #3: You will have a flat spot. If you don't have a flat spot, stress! Because you probably did something wrong. If you do have a flat spot, stress! Because you probably did something wrong. If you follow the instructions exactly, stress! Because you probably did something wrong.
Instructions #4: You will need at least 9 rows of rings to start. What do you mean "to start"?!? I have been working on this fun project for 4 days now! I am so sick and tired of cutting little strips of tape into smaller strips of tape into little pieces to attach the thousands of rings I cut out last week.... Once I hit the 9 rows, I am STOPPING!!
Each row grows exponentially. You will run out of floor space in your tiny apartment bedroom because your little ring has become this massive "thing" that looks weird. And your weird thing will be begged to put on your head...like a hat...
 |
| Not quite done growing and expanding and taking over the world... |
 |
| Starting to curve and grow. |
Instructions #5: Draw on your wavy taped together ring sheet at least 4 circles of radius 8.5 cm. What this should say is: Cry. Get it all out, and then try to draw a circle. I will silently sit in my office and laugh as you struggle your way through this.
It should say that you need more than once person helping you on this step. One person should hold down the waves, and one person should try and draw a circle. It should say that this is the second hardest task of the project. {No, taping is ranked somewhere down by the 8th hardest task....sorry!} It should say that, undoubtedly, you will puncture a hole in your perfect model with your compass end because you are trying to get to circle to line up. It should say that crying is acceptable on this step. It should say that you can cuss, as long as you cuss at the model and not a particular person...or two.
Being a good student that you are, you should have read ALL the instructions before beginning, and noticed that in Instructions #9, you only need two pentagons to turn in. One pentagon comes from one circle...so therefore, Instructions #5 should say, "carefully cut out 2 circles. If you mess up, then you will need to cut out more circles". 4 circles is way too many... At least 4 circles, is way too many past way too many!
ps: Cutting into my model that has taken years months weeks days to complete was like sending your oldest kid off to kindergarten....
 |
| Circle #1 |
 |
| Circle #2 |
 |
| Again, Circle #2 |
Instructions #6: It is possible to construct a right regular pentagon. You're right, it is possible. However, it is also down right hard. Again, it is completely acceptable to cry on this step. Ask someone for help! Cry as you cut apart even more of your beautiful figure.
The edges of the pentagon should be between 10.5-11 cm in length. Ok, you can do this! You measure 10.5 cm...not even close. You measure 10.6 cm...not even close. You measure 10.7 cm....not even close. You get frustrated and just jump straight to 11 cm....waaaaay too far off. Then you go back to 10.8 cm....not even close. 10.9....not even close. Then you cry! {I wish you could cry away the grey hairs....then I would have great hair!} You measure...you fudge...you cry....you measure....you give up and cut out. Hopefully it works in your favor...because the important thing is to have regular right pentagons!!
 |
| Pretty close. |
Instructions #7: Because of the curvature, placing the ruler flat on the model will not yield a straight line. FAIL!
 |
Instructions #8: Cut out your pentagons. Again, cry about having to cut apart all your sweat and tears we are now calling a hyperbolic plane....
 |
| 5 right angles...only 8 rows needed... |
 |
| Do you see the hole... |
Instructions #9: Tape together two of these pentagons.
 |
| Again...a lot of fudging went into this figure.... |
Now, this is the most important step of the whole project. This step tells you how you will be graded. It helps you determine how motivated you have to be to get the best grade. This step tells you all that Dr. Andrist is expecting to see when you turn the sucker in!
Your grade will be determined according to the following: 50 pts for neatness...50 points for accuracy. Feel free to cry at this point. You may think that you have an awesome penatagonal-figure-ish shape, but it will not look like the person's figure sitting on your right...and it won't look like the girl's figure in the front row...and it probably won't pass all your personal goals you have had for this, your new best friend! Many tears...and blood...and sweat...and tape went into this project, and you just don't want to part with it. You want to stand on the nearest corner and show all the passerby's how hard you worked and how almost-perfect your pentagons appear. You want to frame it and hang it in your future classrooms.
You then find out that Dr. Andrist expects you to draw all over it. *GASP* You are so motivated for the high grade that you do draw on it {whilst silently crying on the inside!}.
 |
| Hyperbolic geometry proofs... |
 |
| Hyperbolic Geometry proofs. |
This is what your remaining model looks like:
 |
| A little more than half is left... |
Remind me again why we had to construct soooo much of it? Remind me why we didn't just need to construct half a model and use a smaller amount of supplies and time wasted used? Remind me why we didn't get to work in partnerships and share one model? Remind me again why we taped for hours to then throw away {or keep...or donate...} most of a model that is going unused?
ENDING NOTE:
I finally got to turn in this assignment today. But of course, it didn't go without some kind of hitch! I got all the way to school, parked in an amazing spot, got out of the car, went to grab my stuff from the back seat, and realized that my pentagons were still sitting on my kitchen table next to my apple. I had to get back in the car, drive the 4 miles home {luckily I live pretty close!} and grab it. I was then 15 minutes late to class. I still got to turn my pentagons in for a grade though.
Speaking of grades...the assignment sheet clearly says that this fun project is worth 100 points. Dr. Andrist decided at the last minute that it would only be worth 10 {ten, diez, dix, zehn, 열} points...we are still trying to figure that one out. When the math makes sense to you, please feel free to comment below and explain it to all of us!!
Thank You Dr. Andrist for letting us work on this project. I am so grateful that it is over and done with. I hated it! Love, Gwen